In this story
- Confirm Your Regular Tasks and Software Versions: iPadOS Cannot Be Used as macOS Directly
- Specific Configurations of M4 iPad Air and M5 iPad Pro: The Configuration Choices
- LCD and Tandem OLED official specifications: brightness numbers cannot be directly equated to real-world viewing experience
- Refresh rate and ProMotion: an adaptive range does not mean all scenarios run at 120Hz
- Bare Weight and Reading Area of 11-inch and 13-inch Models: Size Choice Depends on Continuous Handheld Use vs. Fixed Placement
- Stand Keyboards and Handheld Use Are Different Modes; Accessory Weight Changes the Overall Carrying Burden
- Apple Pencil Pressure vs. Tilt: Feature Differences Depend on Whether Your Software Calls These Sensors
- Pencil Compatibility Cannot Be Extrapolated to Keyboards and All Older Models; Each Accessory's Compatibility Must Be Independently Verified
- Capacity Ties CPU Cores and Memory on iPad Pro , What Each Tier Includes
- External Display Mode and Device Connection Capability , Output Specifications Do Not Equal What a Monitor Can Receive
- iPad and Mac as Complete Systems: Using Actual Documents and Workflows to Make a Purchase Decision
Confirm Your Regular Tasks and Software Versions: iPadOS Cannot Be Used as macOS Directly
Before discussing any specific model, you need to confirm a premise that is easy to overlook: whether the software you rely on daily has a fully functional version on iPadOS, and whether your current workflow allows you to operate without macOS. List the applications and specific functions you depend on before deciding which work an iPad can take on. This guide draws on Apple specifications checked on September 9, 2026; it is not a hands-on comparison.
Both the iPad Air M4 and iPad Pro M5 run iPadOS, not macOS. This means that even if the hardware specifications are close to a laptop, the software ecosystem still has structural differences. If you must use an application that only has a macOS version, or if a certain iPad version lacks a key feature, then no matter which iPad you choose, you cannot bypass this limitation. Taking the MacBook Pro as a reference, the current 14-inch MacBook Pro is available with M5, M5 Pro, or M5 Max chips and runs macOS; you still need to check the system, chip, and version requirements of your applications[5]. The iPad can only run iPadOS applications and can also access web functions through a browser depending on service support, but the functional completeness and offline capability of the web version need to be verified separately.
Therefore, before purchasing, it is advisable to list the tasks you must complete each week item by item, then go to the App Store to confirm whether each application has an iPad version and verify whether its functions are consistent with the desktop version. There is no shortcut for this step, nor can it be replaced by the assumption that "most software is available." Especially when it involves file management, multi-window operations, plugin support, external device drivers, or specific industry software, the limitations of iPadOS will directly determine whether the device can enter your workflow. If a key piece of software only has a macOS version, then the entire device plan needs to return to the Mac product line for consideration, rather than choosing between iPad models.
Additionally, the iPadOS version also affects the capability with external devices. For example, connecting to a Studio Display requires iPadOS 26.3.1 or later, and the device itself must be on the compatibility list[4]. If the iPad model you have is older or the system version is not updated, even if the hardware interface supports it, it may not output to the Studio Display properly. Therefore, while checking the software, you also need to confirm whether the system version running on the iPad you currently own or plan to purchase meets the requirements for your external display or other accessories.
Specific Configurations of M4 iPad Air and M5 iPad Pro: The Configuration Choices
The currently available iPad Air is equipped with the M4 chip, and the iPad Pro with the M5 chip. There are clear differences in core specifications between the two, but the significance of these differences depends on which combined conditions you will actually use.
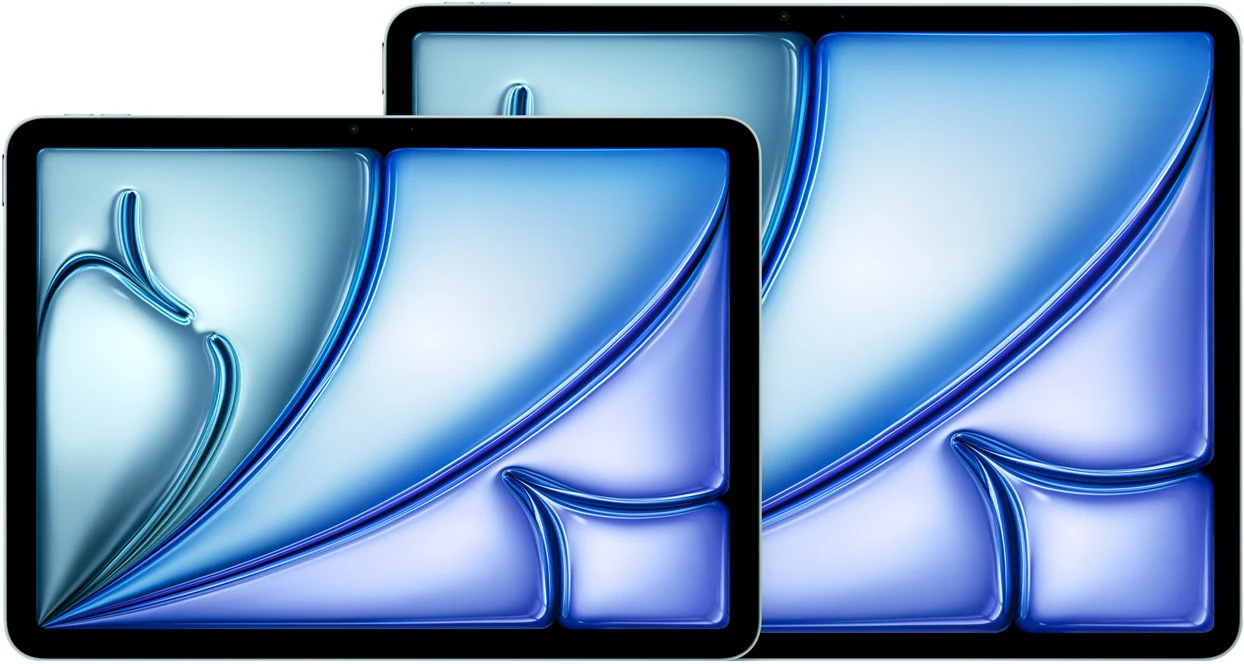
The iPad Air M4 comes in two sizes, 11-inch and 13-inch, both with LCD IPS panels. The resolutions are 2360×1640 and 2732×2048 respectively, with a pixel density of 264 ppi for both, supporting P3 wide color gamut and True Tone, with full lamination. The typical brightness is 500 nits for the 11-inch and 600 nits for the 13-inch[1]. Both sizes come with 12GB of memory and an 8-core CPU, 9-core GPU. Storage capacity starts at 128GB, with options for 256GB, 512GB, and 1TB. The interface is USB 3 with a maximum speed of 10Gbps, supporting one external display up to 6K 60Hz[1]. The bare weight of the WiFi models is 464 grams and 616 grams respectively, excluding accessories like the pencil or keyboard case[1].
The iPad Pro M5 also comes in 11-inch and 13-inch sizes, but the screen technology is completely different, using a Tandem OLED panel that supports ProMotion adaptive refresh rates ranging from 10Hz to 120Hz. The 11-inch resolution is 2420×1668, and the 13-inch is 2752×2064, both with a pixel density of 264 ppi. The maximum brightness for SDR content is 1000 nits, for HDR content full-screen is 1000 nits, and the peak brightness of 1600 nits is limited to HDR content[2]. The bare weight of the WiFi models is 444 grams and 579 grams respectively, meaning the 11-inch Pro is 20 grams lighter than the same-sized Air, and the 13-inch Pro is 37 grams lighter than the same-sized Air. There is no rule that "Pro must be heavier"[2].
Memory and processor core counts on the Pro are not fixed values but are tied to storage capacity. The 256GB and 512GB versions come with 12GB of memory and a 9-core CPU, while the 1TB and 2TB versions come with 16GB of memory and a 10-core CPU; all versions have a 10-core GPU[2]. This means if you need more memory or more CPU cores, you must choose a storage capacity of 1TB or above; you cannot upgrade the memory separately. The textured glass option is also only available on the 1TB and 2TB versions[2]. Regarding interfaces, the Pro is equipped with Thunderbolt 3 / USB 4, with a maximum speed of 40Gbps, while also being compatible with USB 3 up to 10Gbps. For external display capability, the Pro supports one display up to 6K 60Hz or one display up to 5K 120Hz, but cannot connect multiple high-resolution displays simultaneously[2].
From these specifications, it can be seen that the difference between the Air and Pro is not just about "performance strength," but a combination of differences in screen technology, the binding relationship between memory and storage, interface speed, and external display capability. If you do not need the Tandem OLED screen, nor 16GB of memory or Thunderbolt speeds, then the Air's 12GB of memory and USB 3 interface may already cover your needs. Conversely, if your workflow genuinely depends on high-brightness HDR content, higher memory capacity, or faster peripheral transfer speeds, then the Pro's configuration has practical significance.
Another detail to check is Apple Pencil compatibility. Both the Apple Pencil Pro and the USB-C pencil are compatible with the M5 iPad Pro and M4 iPad Air, but this does not mean all older iPads can use these two pencils, nor can it be inferred that other accessories like keyboards are universally compatible[3]. The USB-C pencil supports tilt sensitivity but has no pressure sensitivity; it pairs and charges via USB-C, and magnetic attachment is only for storage. The Pencil Pro features pressure sensitivity, squeeze, rotation, double-tap, haptic feedback, and Find My functionality, pairing and charging via magnetic attachment[3]. The Find My function does not imply the pencil itself has a speaker; it can only be understood according to the officially listed Find My features, without inferring sound-making ability or search range. Whether an application supports a certain gesture requires checking that specific app's description; it cannot be assumed that all drawing or note-taking software implements squeeze or rotation operations.
Before purchasing, comparing these configuration differences against your actual task list is more useful than simply comparing parameters. For example, if you need to connect to a Studio Display, you need to confirm that the iPad model is on the compatibility list and that the system version meets the requirements. The current list of iPads compatible with the Studio Display includes models like Pro M4, Pro M5, Air M2, Air M3, and Air M4, with a system requirement of iPadOS 26.3.1 or later[4]. The fact that an iPad Pro can output a certain resolution and refresh rate does not mean the Studio Display can receive it at that specification, because the Studio Display itself is a 27-inch 5K 60Hz display and does not support a 120Hz refresh rate[4]. Therefore, the actual performance of an external display depends on the intersection of the iPad's output capability and the display's specifications, not just the iPad's maximum output parameters viewed in isolation.
LCD and Tandem OLED official specifications: brightness numbers cannot be directly equated to real-world viewing experience
The difference in screen technology between the iPad Air M4 and iPad Pro M5 is the most fundamental dividing line between these two product lines. The Air uses LCD IPS panels across the entire line, while the Pro uses Tandem OLED panels across the entire line. This is not a matter of higher or lower configurations of the same technology, but two completely different display principles. Therefore, their brightness specifications, refresh rate mechanisms, and applicable scenarios need to be understood separately.
First, consider the Air's LCD specifications. The 11-inch iPad Air has a typical brightness of 500 nits, while the 13-inch model has 600 nits. Both support P3 wide color gamut, True Tone, and full lamination, with a pixel density of 264 ppi[1]. It is important to note that these are Apple’s published brightness specifications and does not represent the brightness the screen will maintain under all usage environments. For example, in direct sunlight outdoors, screen readability needs to be checked with the actual content, reflections and surroundings, and the actual perceived difference between the two requires comparison under similar lighting conditions. Whether it meets outdoor reading needs also depends on the ambient light conditions during your actual use; a single number cannot provide an absolute judgment. Furthermore, the 13-inch Air's 600 nits typical brightness is higher than the 11-inch model's 500 nits. This means that if you frequently use the device in bright environments and do not require a smaller body, the 13-inch Air has a brightness advantage over the smaller model in the same series. However, whether it meets your needs still requires comparing actual content, and a brightness number alone cannot substitute for a decision.
The Pro's Tandem OLED panel has completely different brightness specifications. According to official data, the Pro's maximum SDR content brightness is 1000 nits, HDR content full-screen maximum is 1000 nits, and the peak brightness of 1600 nits is limited to HDR content[2]. A key limitation here is that the 1600 nits peak brightness only appears in localized highlight areas of HDR content; it is not full-screen brightness, nor is it the brightness for SDR content. If your daily content is primarily SDR, such as documents, web pages, code editors, or standard dynamic range images, the Pro's screen reaches a maximum of 1000 nits in these scenarios, not 1600 nits. Therefore, when comparing the brightness of the Air and Pro, you must first clarify the type of content you handle. If you do not edit or watch HDR content, the Pro's peak brightness advantage will not manifest in your actual use.
Compare the screens using the same material. A bright page helps you examine text and its background, a dark photograph lets you inspect shadow areas, and an HDR clip addresses the highlights you care about. Confirm that the file and playback method match before comparing the devices. A demonstration video on one and a web page on the other cannot show how they render the same content. This guide uses published specifications and includes no controlled measurements of brightness, color accuracy or contrast.
Refresh rate and ProMotion: an adaptive range does not mean all scenarios run at 120Hz
The Pro's screen supports ProMotion adaptive refresh rate, ranging from 10Hz to 120Hz, while the Air's LCD screen does not have this technology[2]. Apple publishes an adaptive range. That range does not tell us the refresh rate of a particular frame or operation, and it cannot establish a battery-life saving. Compare scrolling, writing and video playback separately to see how the operations you care about behave.[2]
For the Air, Apple does not list its refresh rate value in the official specifications. Therefore, one cannot assume the Air's screen has a fixed refresh rate, nor can a simple numerical comparison be made with the Pro's ProMotion. If you have a clear requirement for screen fluidity, you need to personally compare the performance of the two devices under the same operations at a retail store, such as scrolling web pages, dragging files, or writing with the Pencil, rather than relying on a specification sheet to make a judgment.
Another practical impact of ProMotion is on Pencil usage. Both the Apple Pencil Pro and the USB-C Pencil are compatible with the M5 iPad Pro and M4 iPad Air, but ProMotion is only available on the Pro[3][2]. The Pencil's sampling rate and the screen's refresh rate are two independent parameters. Actual writing latency cannot be inferred solely from the refresh rate or the pencil's name; the specific app and device combination requires separate comparison. If you engage in work requiring extremely high stroke responsiveness, such as detailed illustration or handwritten notes, the Pro's ProMotion may bring a perceivable improvement. However, the extent of this improvement depends on your current device and comparison baseline, and a single conclusion cannot cover all users.
When trying the Pencil, check that both devices use the same application, brush and comparable settings. Separate writing, page turning and line drawing so that a tool setting does not become a supposed screen difference. If a store cannot open your application or files, the demonstration can answer questions only about those demonstration conditions. People who rely on a particular professional application should also check its documented support.
Finally, it must be clarified that these specifications do not establish an eye-health benefit. The official specifications reviewed this time do not claim that ProMotion or a 120Hz refresh rate has an eye-care effect, nor do they correlate screen refresh rate with eye fatigue indicators. Therefore, ProMotion cannot be understood as a health feature, and eye-care-related purchasing advice cannot be made based on refresh rate parameters. Screen selection should be based on display performance requirements, not on unverified health inferences.
Bare Weight and Reading Area of 11-inch and 13-inch Models: Size Choice Depends on Continuous Handheld Use vs. Fixed Placement
iPad Air and iPad Pro both come in 11-inch and 13-inch sizes, but these numbers are screen size designations. The actual viewable area depends on the official size specifications, not the device's physical holding area or viewable region. When comparing the two sizes, factors such as bare weight, body dimensions, and screen display area need to be considered simultaneously, as they respectively affect hand fatigue, portability, and content readability.
First, consider bare weight. For the WiFi models of the iPad Air M4, the 11-inch weighs 464 grams and the 13-inch weighs 616 grams, a difference of 152 grams [1]. For the WiFi models of the iPad Pro M5, the 11-inch weighs 444 grams and the 13-inch weighs 579 grams, a difference of 135 grams [2]. This means that whether you choose Air or Pro, upgrading from 11-inch to 13-inch results in corresponding bare weight differences of 152 grams and 135 grams respectively; a generic phone weight cannot be used as a substitute. Both differences compare only the bare device, without accounting for protective cases and other accessories. If you are accustomed to holding the iPad in one hand for reading or annotating documents, whether the bare weight of the 13-inch affects continuous handheld use should be tested according to your actual posture, and also compared against the 444-gram or 464-gram 11-inch models. A weight chart cannot provide a comfortable usage duration for every individual.
However, handheld scenarios are not limited to single-hand holding. If you typically hold the device with both hands, or rest it on your lap or a desk, the impact of the weight difference is significantly reduced. In this case, the larger display area of the 13-inch might become an advantage, as you can see more content, reducing the need for scrolling and zooming. Therefore, when evaluating weight, you need to first clarify your typical usage posture: single-hand unsupported holding, two-hand support, or the device resting on a flat surface most of the time. Sensitivity to weight varies completely across these three postures, and a uniform standard of "lighter is better" cannot cover all situations.
Screen display area is another variable that needs independent calculation. The diagonal length difference between 11-inch and 13-inch is 2 inches, but the ratio of actual viewable area is not a simple linear relationship. Taking the iPad Air as an example, the 11-inch resolution is 2360×1640, and the 13-inch is 2732×2048 [1]. The screen aspect ratios corresponding to these resolutions are not exactly the same, so the viewable area ratio needs to be calculated after determining the specific length and width dimensions. But even without precise calculation, it's evident from the resolution numbers themselves that the 13-inch has several hundred more pixels in both horizontal and vertical directions. This means that when displaying the same content, the 13-inch can present larger fonts, more lines of text, or a wider page layout. For tasks like reading PDF documents, viewing drawings, or split-screen operations, the extra area of the 13-inch can be used to compare whether it reduces zooming operations in your own documents and applications; efficiency improvements cannot be directly guaranteed from the resolution alone.
However, a larger display area also means a longer diagonal, which changes the overall dimensions of the device and thus affects portability. A 13-inch iPad requires larger bag space, and the larger body can become a burden in scenarios like an economy class airplane tray table, a crowded subway car, or single-hand reading. Therefore, the choice between 11-inch and 13-inch is essentially a trade-off between portability and information display efficiency, and the answer to this trade-off depends on the distribution of your usage scenarios. If most of your usage time is on a fixed desk, the display advantage of the 13-inch will consistently play a role; if you are mostly mobile, the lightweight advantage of the 11-inch will be more prominent.
On the Pro product line, the weight relationship between 11-inch and 13-inch differs from the Air. The 11-inch Pro weighs 444 grams, the 13-inch Pro weighs 579 grams, while the 11-inch Air weighs 464 grams and the 13-inch Air weighs 616 grams [1][2]. This means the 11-inch Pro is 20 grams lighter than the same-sized Air, and the 13-inch Pro is 37 grams lighter than the same-sized Air. Therefore, if you are hesitating between Pro and Air and weight is your primary consideration, the Pro actually has a slight advantage in absolute weight; the rule that "Air is definitely lighter" does not hold. However, whether a difference of 20 to 37 grams is perceptible in actual use depends on your sensitivity and comparison baseline; it cannot be assumed that everyone can clearly feel this magnitude of difference.
Stand Keyboards and Handheld Use Are Different Modes; Accessory Weight Changes the Overall Carrying Burden
The bare weight of the iPad is only part of the carrying burden, because after adding a protective case, keyboard, or stand, what you actually carry is the complete combination. The weight of the chosen accessories needs to be checked. Apple does not officially list the weights of keyboards and protective cases on the specifications page, so a precise combined weight cannot be given. However, we can analyze how accessories change the way the device is carried and used from the perspective of usage modes.
Stand keyboard accessories, like the Magic Keyboard, transform the iPad from a handheld device into a notebook-like form factor. In this form, the iPad's screen is fixed at a certain angle, the keyboard provides physical input capability, and the trackpad replaces finger tap operations. The device should be placed according to the specific keyboard's support method, and during a trial, you should check the screen angle, base footprint, and opening/closing mechanism. Therefore, if you choose to use a stand keyboard, you can simultaneously consider how to place the device with the keyboard attached and how to hold it after detaching the keyboard. In this case, the extra weight and size of the 13-inch have little impact during desktop use, while the larger screen area offers clear advantages when paired with a keyboard for text input, spreadsheet processing, or multi-window operations.
But the stand keyboard form also introduces new constraints. First, the keyboard itself adds to the overall weight, making the total burden placed in a bag significantly higher than the bare device weight. If you need to move frequently between different locations, the weight and thickness of the keyboard will directly affect your willingness to carry it. Second, stand keyboards typically require a certain amount of deployment space. In cramped environments like an economy class airplane seat, a second-class high-speed train seat, or a small coffee table, it may not be possible to fully open it to a comfortable angle. Therefore, when deciding whether to pair a keyboard, you need to assess whether the places you frequently use have sufficient desk space, rather than just considering the input efficiency gain the keyboard provides.
The handheld form is completely different. Without a keyboard, the iPad's weight is the bare device weight plus the weight of the protective case. Protective case weight varies by specific product, and no verified accessory weight data is available here. During a trial, you can open a document you usually read, use your common holding posture to flip pages and annotate, and then switch to the other size. What you record is whether your operation is comfortable; do not convert the bare weight into a fixed fatigue duration. Whether the protective case obstructs the holding position and whether it is easy to attach and detach should also be checked with the specific accessory.
Therefore, keyboard use and handheld use can alternate; the key is whether you are willing to attach, detach, carry, and place the accessories. If you buy a keyboard, the convenience of the handheld scenario decreases due to the increased overall weight; if you choose the bare device or a lightweight protective case, desktop text input efficiency will be limited by the touchscreen keyboard. In the purchase decision, you need to first determine your primary usage mode, then choose the size and accessory combination around that mode, rather than trying to find a solution that is perfect in all scenarios.
Another detail that needs checking is that keyboard compatibility cannot be extrapolated from Apple Pencil compatibility. The Apple Pencil Pro and USB-C Pencil are both compatible with the M5 iPad Pro and M4 iPad Air, but this does not mean these two iPads are compatible with all older keyboards, nor can it be inversely deduced that a certain keyboard is compatible with all iPad models [3]. The compatible model, size, and system requirements for a keyboard need to be checked separately. Therefore, when choosing a keyboard, you need to individually confirm that the keyboard explicitly supports the iPad model and size you purchased; inferences cannot be made based on the Pencil compatibility list.
For users who own both a MacBook and an iPad, the presence of a stand keyboard introduces an additional decision problem: in a mobile office scenario, whether to bring the MacBook or the iPad with a keyboard. The 14-inch MacBook Pro is itself a complete laptop running macOS, and it must also meet the system, chip, and version conditions required by specific software [5]. While the iPad plus keyboard combination is close to a notebook in form, it runs iPadOS, and its software ecosystem and file management methods have structural differences from macOS. If most of your workflow can be completed on iPadOS, the iPad plus keyboard combination might be lighter than a MacBook; but if your core software only has a macOS version, then no matter how light the iPad plus keyboard combination is, it cannot replace the MacBook. Check software dependencies first, then compare size and weight against the task list introduced earlier.
Apple Pencil Pressure vs. Tilt: Feature Differences Depend on Whether Your Software Calls These Sensors
Both Apple Pencil Pro and the USB-C Pencil are compatible with the M5 iPad Pro and M4 iPad Air, but the two pens have fundamental differences in sensor configuration and interaction methods. Choosing one does not come down to which pen is inherently better, but rather whether the software you use actually calls upon these hardware capabilities.
The USB-C Pencil has a relatively basic sensor configuration. It supports tilt sensing but lacks pressure sensitivity [3]. Tilt sensing detects the angle between the pen barrel and the screen. When you use a tilted stroke in a drawing app, the software can adjust the stroke width or texture based on the angle change, simulating the effect of shading with the side of a pencil. However, tilt sensing is not pressure sensitivity; it cannot detect how hard you are pressing the tip. Therefore, if you need to control line thickness or ink density based on the force of your stroke, the USB-C Pencil cannot provide this dimension of input. The USB-C Pencil pairs and charges via a USB-C port. The magnetic attachment is for storage only and does not offer wireless charging functionality [3]. This means you need to use a corresponding USB-C connection to pair or charge; it cannot charge by attaching to the side of the iPad like the Pencil Pro.
The Pencil Pro's sensor configuration covers more interaction dimensions. It features pressure sensitivity, tilt sensing, squeeze, barrel roll, double-tap, and haptic feedback [3]. Pressure sensitivity detects the force applied to the tip, mapping force changes to parameters like line thickness, opacity, or others, which is the foundation for distinguishing stroke weight in digital drawing and handwritten notes. Squeeze and barrel roll are new interaction methods introduced with the Pencil Pro. Squeeze is typically triggered by pressing the barrel, while barrel roll detects angle changes by rotating the barrel. The specific operations corresponding to these gestures should be based on the settings and instructions within the application. The double-tap function allows you to tap twice on the barrel to trigger a preset action, such as switching between a tool and an eraser. Haptic feedback provides a physical confirmation sensation through a vibration motor inside the pen body, for example, offering feedback for supported operations so the user knows the action has been recognized. The Pencil Pro pairs and charges magnetically, automatically pairing and beginning to charge when attached to the side of the iPad, without needing to plug into a port [3]. The official specifications list a Find My feature, but this does not mean the pen itself has a speaker; one cannot infer sound-producing or other unstated capabilities from this name [3].
The actual value of these sensors and features depends entirely on whether your software supports them. Pressure sensitivity is a basic function of most professional drawing apps, but support for gestures like squeeze, barrel roll, and double-tap varies by app. A specific note-taking app might support double-tap to switch to the eraser but not squeeze to bring up a tool palette; a specific drawing app might support barrel roll to adjust the brush angle but not squeeze operations. Therefore, before deciding to buy the Pencil Pro or the USB-C Pencil, you need to first verify the level of support your commonly used software has for these gestures, rather than assuming all features work seamlessly in all apps. There is no shortcut for this verification process; you need to check the software's update notes or the Pencil options in the settings menu one by one, and you cannot make a judgment based on the assumption that "mainstream software should support it."
The choice of Pencil is also related to the distribution of your usage scenarios. If your iPad is mainly used for reading annotations, document markups, or simple note-taking, tilt sensing might already cover your needs, and the lack of pressure sensitivity may not necessarily be an obstacle. However, if you engage in digital painting, calligraphy practice, or any creative work requiring force control, pressure sensitivity is a basic requirement, and the functional gap of the USB-C Pencil will directly limit your creative ability. Squeeze, barrel roll, and haptic feedback are efficiency-enhancing features. They can speed up tool switching and reduce the need for your fingers to travel back and forth on the screen, but the value of these features depends on whether your workflow involves frequent tool switching. If you typically use only one brush or tool to complete most of your work, the frequency of using these gestures might be far lower than you expect.
Pencil Compatibility Cannot Be Extrapolated to Keyboards and All Older Models; Each Accessory's Compatibility Must Be Independently Verified
Both Apple Pencil Pro and the USB-C Pencil are compatible with the M5 iPad Pro and M4 iPad Air. This compatibility statement is easily misinterpreted as broader accessory compatibility, but the reality is that the Pencil's compatibility list cannot be extrapolated to keyboards, cases, or other accessories, nor can it be used to infer the compatibility range of older iPad models.
First, Pencil compatibility cannot serve as a basis for keyboard compatibility. When choosing a keyboard, you need to check the specific product's model and size list. The fact that two iPads are compatible with the same Pencil only proves that this specific pen is usable; it does not prove that a keyboard can be installed across models [3]. Therefore, when selecting a keyboard, you need to independently confirm whether the keyboard's compatibility list explicitly states your purchased iPad model and size, and you cannot make an inference based on Pencil compatibility. This principle also applies to cases, stands, and other accessories connected via magnetic attachment or physical interfaces.
Second, Pencil compatibility cannot be used to infer the compatibility range of older iPad models. Apple Pencil Pro and the USB-C Pencil are compatible with the M5 iPad Pro and M4 iPad Air, but this does not mean all older iPads can use these two pens [3]. Older iPads might use the first-generation or second-generation Apple Pencil. The pairing methods, charging methods, and sensor configurations of these pens differ from the Pencil Pro and USB-C Pencil. You need to check their respective compatibility lists and cannot generalize based on the generation name. If you have an older Pencil, you need to confirm whether this pen is compatible with the new device before purchasing a new iPad, rather than assuming "it's all Apple Pencil, so it should work." Similarly, if you plan to buy a new pen, you also need to confirm whether it is compatible with your existing iPad, especially if you own multiple iPads from different generations.
When verifying accessory compatibility, you also need to pay attention to system version requirements. For example, connecting to a Studio Display requires iPadOS 26.3.1 or a newer system, and the device itself must be on the compatibility list [4]. The current list of iPads compatible with the Studio Display includes models like the Pro M4, Pro M5, Air M2, Air M3, and Air M4, but iPads not on the list might not output properly to the Studio Display even if the hardware interface supports it [4]. This means the system version and hardware model are two independent constraints that must be met simultaneously. If your iPad model is on the compatibility list but the system version is too low, you need to upgrade the system first before use; for devices not on the official list, you also need to verify specific video output and feature support, and cannot directly assert that all connections are impossible. Therefore, before purchasing a Studio Display or other external monitor, you need to check both the iPad model and the system version, not just one of them.
The actual performance of an external display also depends on the intersection of the iPad's output capability and the display's specifications. The iPad Pro M5 supports connecting one external monitor up to 6K 60Hz or one up to 5K 120Hz, but the Studio Display itself is a 27-inch 5K 60Hz display and does not support a 120Hz refresh rate [2][4]. Therefore, even if the Pro can output 5K 120Hz, the actual operation when connected to a Studio Display is still 5K 60Hz, because the display's specifications limit the final output. The fact that an iPad Pro can output a certain resolution and refresh rate does not mean any monitor can receive it at that specification. The actual performance of an external display is the intersection of the iPad's output capability and the monitor's receiving capability; you cannot look solely at the iPad's maximum output parameters. This principle applies to all external monitors, not just the Studio Display.
In the process of verifying accessory compatibility, the most error-prone step is conflating the compatibility lists of different accessory categories. The compatibility of Pencils, keyboards, cases, external monitors, chargers, and cables are each independent, with no unified rule to follow. The fact that one accessory works on a specific iPad model does not allow you to deduce that another accessory will also work, nor that the same accessory will work on another iPad model. Therefore, before purchasing any accessory, you need to individually consult the official compatibility list for that accessory to confirm that your iPad model and size are explicitly listed, rather than making inferences based on the compatibility of other accessories. Although this step is tedious, it can avoid the trouble of discovering an accessory is unusable after purchase, especially for higher-priced accessories like keyboards and external monitors, where the necessity of compatibility verification is even greater.
Capacity Ties CPU Cores and Memory on iPad Pro , What Each Tier Includes
On the iPad Pro M5, the storage capacity you choose does not just determine how many files you can store. It directly decides which processor and memory combination you receive. This is fundamentally different from the iPad Air M4, and it is the point where misunderstandings most easily arise within the Pro line.
On the iPad Air M4, whether you choose 128GB, 256GB, 512GB, or 1TB of storage, the memory and processor core count are fixed: 12GB of memory, an 8-core CPU, and a 9-core GPU[1]. This means that on the Air, the storage choice affects only available space. It does not change the CPU core count, GPU core count, or memory capacity listed here, and this fact cannot be used to prove that all performance is identical. Choose capacity around your files. This guide contains no performance measurements comparing storage tiers.
The rules for the iPad Pro M5 are entirely different. The 256GB and 512GB configurations come with 12GB of memory and a 9-core CPU, while the 1TB and 2TB configurations come with 16GB of memory and a 10-core CPU. All versions have a 10-core GPU[2]. This means that if you need 16GB of memory or the full 10-core CPU, you must choose 1TB or more of storage. There is no option to upgrade memory or CPU core count independently. This is not a simple progression where the higher configuration is “faster.” It is a hard bundling threshold. You cannot buy a 512GB model and request 16GB of memory, nor can you buy a 1TB model and downgrade to 12GB of memory. Storage, memory, and CPU core count are tied into two fixed combinations. Your choice is effectively a binary decision between these two combinations, not a flexible configuration of three independent parameters.
The practical impact of this bundling rule depends on whether your workload actually hits the ceiling of 12GB of memory or a 9-core CPU. If your main tasks on the iPad are document processing, web browsing, video playback, or light image editing, you should first confirm whether the lower capacity tier meets your requirements using your actual applications and files, rather than deriving a guarantee of sufficiency from software categories. However, if you need to handle multi-layer high-resolution image compositing, audio engineering with a large number of tracks, complex 3D model rendering, or running multiple professional applications that require significant memory simultaneously, the difference between 16GB of memory and a 10-core CPU could shift from a number on a spec sheet to a perceptible difference in actual work. The key point here is that you need to first confirm whether the software you use can utilize more than 12GB of memory, and whether its multi-core scheduling strategy allows the extra CPU core to produce a practical benefit. How an application utilizes resources requires specific verification; an unverified memory threshold cannot be given to determine the configuration.
The nano-texture glass option further reinforces this bundling logic. Apple restricts the nano-texture glass option to the 1TB and 2TB models[2]. This means that if you want nano-texture glass to reduce screen reflections, you must not only pay for the glass itself but also accept the entire combination of 1TB storage, 16GB of memory, and a 10-core CPU. You cannot select the nano-texture glass separately on a 512GB model. Therefore, the actual acquisition cost of the nano-texture glass should include both the actual price difference of the capacity tier and the price of the glass option, verified against the current order configuration. Whether this price difference is worthwhile depends on your sensitivity to screen reflections and whether you need the extra storage and performance that come with the 1TB model. If you are not sensitive to reflections, or primarily use the device indoors under controlled lighting, the value of the nano-texture glass is diminished, and the extra cost brought by the bundle becomes a pure burden.
In a purchase decision, this bundling rule requires you to first determine your priority: is storage capacity more important, or are memory and CPU core count more important? If you need 16GB of memory but only need 512GB of storage, you must still buy the 1TB model. In this case, the extra storage space may sit idle for a long time, and you are effectively paying for storage you do not need to get the memory you do need. Conversely, if you need 1TB of storage but have modest performance requirements, you will automatically receive 16GB of memory and a 10-core CPU. These extra hardware capabilities may never be fully utilized in your usage scenario. Neither situation is right or wrong, but you need to be clearly aware of this bundling before purchasing, rather than seeing “up to 16GB of memory” on a spec sheet and assuming you can freely combine components as you would with a desktop computer.
External Display Mode and Device Connection Capability , Output Specifications Do Not Equal What a Monitor Can Receive
When connecting to an external monitor, the iPad Pro and iPad Air have distinct output capabilities, but the practical significance of these differences needs to be cross-checked against the specifications of the monitor you intend to connect. You cannot look at the iPad’s maximum output parameters in isolation.
The USB-C port on the iPad Air M4 supports DisplayPort video output and also supports up to 10Gbps USB 3 data transfer; these are not the same specification. It supports connecting one external monitor up to 6K at 60Hz[1]. The iPad Pro M5 connects via a Thunderbolt 3 / USB 4 port with speeds up to 40Gbps, while remaining backward compatible with USB 3 at up to 10Gbps. It supports connecting one external monitor up to 6K at 60Hz or one monitor up to 5K at 120Hz[2]. Looking at the parameters, the Pro’s advantages are twofold: first, a higher interface speed that can support faster external storage or other Thunderbolt devices; second, when connecting an external monitor, it adds the 5K 120Hz output capability. But whether these two advantages materialize in your actual use depends on what device you are connecting.
Take the Studio Display as an example. It is a 27-inch 5K 60Hz monitor and does not support a 120Hz refresh rate[4]. When you connect an iPad Pro M5 to the Studio Display, the Pro’s 5K 120Hz output capability cannot be received by the monitor. The actual operation remains at 5K 60Hz because the monitor’s specifications limit the final output[2][4]. In this situation, the Pro’s advantage over the Air in external monitor connection is compressed. The Air supports 6K 60Hz, and the Pro also supports 6K 60Hz. Both can output normally under the Studio Display’s 5K 60Hz specification. The Pro’s extra 120Hz capability cannot be realized in this specific combination. Therefore, if you plan to connect a Studio Display or a similar 60Hz monitor, the Pro’s advantage in external display refresh rate does not constitute a reason to buy.
However, the Pro’s Thunderbolt interface speed advantage still exists when connecting other peripherals. If you use an external SSD for large file transfers, or connect a Thunderbolt dock to drive multiple devices simultaneously, you should confirm whether the drive, cable, and connection protocol support the corresponding mode. The interface’s upper limit cannot be directly converted into an actual file transfer time. Whether this difference matters depends on whether your workflow frequently involves reading from and writing to high-capacity external storage. If you primarily use cloud storage or built-in storage and rarely connect an external hard drive, the Thunderbolt speed advantage will not be frequently invoked in your daily use.
Another constraint to verify is the system version and compatibility list. Connecting a Studio Display requires iPadOS 26.3.1 or later, and the device itself must be on the compatibility list[4]. The current compatibility list includes Pro M4, Pro M5, Air M2, Air M3, Air M4, and other models[4]. If your iPad model is on the list but the system version is too old, you need to upgrade before use. If the model is not on the list, even if the hardware port is USB-C or Thunderbolt, it may not output to the Studio Display normally. Therefore, before purchasing a monitor, you need to check both the iPad model and the system version, not just the port type. The physical compatibility of a USB-C port does not equal display protocol compatibility. This is the most error-prone step when connecting an external monitor.
The iPad Pro supports connecting one external monitor up to 6K 60Hz or one up to 5K 120Hz, but this does not mean it can connect multiple high-resolution monitors simultaneously[2]. If you need a multi-screen work environment, the iPad Pro’s external monitor capability is for a single screen. It cannot drive two or more external monitors simultaneously like a MacBook Pro. Depending on the chip, the 14-inch MacBook Pro can support two or more external monitors, runs macOS, and its multi-window management and cross-screen operation capabilities are structurally different from iPadOS[5]. Therefore, if you need a multi-screen setup, neither the iPad Pro nor the Air can replace a MacBook’s multi-monitor capability. This is not a performance issue but a limitation of iPadOS and the hardware design.
The actual performance of an external monitor ultimately depends on the intersection of the iPad’s output capability and the monitor’s specifications. The fact that the iPad Pro can output 5K 120Hz does not mean your 4K 60Hz monitor can run at 120Hz. The fact that the iPad Air can output 6K 60Hz does not mean you will get better image quality when connecting a 1080p monitor, because the monitor’s physical resolution limits the number of pixels ultimately presented. When verifying connection capability, you need to check the iPad’s output ceiling and the monitor’s receiving ceiling simultaneously, look up the specific display modes both support, and also meet the cable and adapter conditions. You cannot simply take the smaller number. This principle applies to all external monitors, not just the Studio Display.
For users who use an iPad and an external monitor simultaneously, it is also necessary to note how iPadOS utilizes the external screen. iPadOS supports using an external monitor as an extended desktop, but the specific performance of this feature depends on whether the app is adapted for the external screen. Some apps can display content full-screen on the external monitor, while others may only mirror the iPad’s built-in screen. This is different from the mature multi-window external monitor experience on macOS. You cannot assume that all iPad apps can run independently at native resolution on an external screen. Therefore, before relying on an external monitor as a primary work environment, you need to test the behavior of your frequently used apps on the external screen, confirming whether they support extended desktop mode and whether the feature completeness in that mode meets your needs.
iPad and Mac as Complete Systems: Using Actual Documents and Workflows to Make a Purchase Decision
After separately verifying software versions, screen specifications, dimensions and weight, pencil compatibility, and the Pro's capacity binding rules, this scattered information needs to be integrated into an actionable judgment framework. The core of this framework is not comparing whether iPad or Mac is better, but breaking down your actual workflow into specific tasks, then verifying one by one which device can complete each task, and under what conditions.
The task list needs to be written down to actual functions, not just application names. List the file formats you must use, annotation methods, import and export requirements, required plugins, and external devices, then check the support status of the corresponding software on iPad one by one. This article has not tested your software or projects, and cannot use the device processor name as a software compatibility conclusion.
The second step is to match each task on the list with a device solution. There are three basic solutions here: iPad only, Mac only, iPad plus Mac. The prerequisite for the iPad-only solution is that all tasks on your list can be completed on iPadOS with efficiency and quality you find satisfactory. This requires you to verify item by item, not skip over it with "most can be done." The Mac-only solution applies to workflows where core software only has macOS versions, or where multi-window, multi-tasking demands are intensive. The 14-inch MacBook Pro runs macOS, still requires checking the system, chip, and version conditions required by applications, and simultaneously supports multiple external displays, a capability iPad currently cannot replace[5]. The iPad plus Mac solution applies to users for whom some tasks are more natural on iPad and some tasks must be done on Mac. For example, using iPad to read and annotate PDFs, hand-draw sketches, or take on-site notes, then returning to Mac for deep editing, compiling code, or managing complex file structures. This solution requires separately checking the total cost and carrying burden of both devices, but if your workflow is genuinely distributed across two device forms, it is the most pragmatic combination.
The third step is, after selecting a solution, to apply the configuration constraints verified in previous sections to the specific model choice. If you chose the iPad-only solution, then you need to decide Air or Pro, 11-inch or 13-inch, and how much storage capacity, based on your task list. The basis for judgment here is not the numerical size on the spec sheet, but whether your tasks actually invoke those differences. If you neither watch nor produce HDR content, the Pro's 1600-nit peak brightness will not be invoked[2]. If you do not need to frequently connect Thunderbolt devices, the Pro's 40Gbps interface speed advantage will not translate into actual efficiency gains[2]. If actual projects show no signs of insufficient capacity, you cannot assume an upgrade is beneficial just based on a larger memory number[2]. Conversely, if your task list does include drawing work that requires pressure sensitivity, then the absence of it on the USB-C pencil will directly limit your creative ability, and between these two pencils, the Pencil Pro with pressure sensitivity should be considered[3]. If your primary usage scenario is one-handed reading, then whether the 13-inch's 616 grams or 579 grams is suitable for sustained handheld use needs to be compared based on your own posture; compare that with the 11-inch models at 444 grams or 464 grams rather than inferring a comfortable holding time from weight alone[1][2]. These judgments are not questions of "which is better," but questions of "does your task trigger this difference."
If you chose the Mac-only solution, then the entire iPad discussion no longer applies, and you need to turn to checking the MacBook Pro's configuration options. The current 14-inch MacBook Pro offers M5, M5 Pro, or M5 Max chips, with different chips corresponding to different memory ceilings, GPU core counts, and external display capabilities[5]. The checking logic here is similar to the iPad Pro's capacity binding: you need to determine which tier of chip and how much memory is needed based on the performance demands in your task list, rather than defaulting to the highest configuration. If your workflow primarily relies on single-core performance, the extra cores of the M5 Pro or M5 Max may not bring linear improvement. If you need to connect more than two external displays simultaneously, you need to confirm whether the selected chip supports this configuration, as external display capabilities differ between chips[5].
If you chose the iPad plus Mac solution, then you need to perform the above checking process for both devices separately, while also considering the collaboration method between the two devices. iCloud can synchronize files between devices, but the timeliness and reliability of synchronization depend on the network environment; you cannot assume all files can seamlessly switch at any moment. Project files for certain professional software may not be fully compatible between the iPad version and the Mac version, requiring verification of cross-device workflow feasibility before purchase. Additionally, the iPad plus Mac combination means you need to carry two devices, and the total weight and volume will be significantly greater than a single-device solution. Whether the added burden of an 11-inch iPad Air at 464 grams bare plus a 14-inch MacBook Pro's weight, compared to carrying a single MacBook Pro, is worthwhile depends on whether your task distribution genuinely requires both devices to be present simultaneously[1][5].
After completing the above steps, the purchase judgment is no longer a vague question of preference, but a decision that can be verified item by item. Your task list determines the device solution, the device solution determines the model choice, and the model choice then determines the specific specifications based on configuration constraints. Every step in this chain has a clear basis for verification, not relying on unverifiable judgments like "adequate" or "better." If a certain task cannot be completed on any iPad, then no matter how good the Pro's screen is or how sensitive the pencil is, the iPad solution will be ruled out. If all tasks can be completed on an iPad Air, then the Pro's additional cost has no corresponding task to support it. This framework does not guarantee you will buy the cheapest or most powerful device, but it makes the pre-purchase verification more concrete, and cannot guarantee that an untested workflow will definitely be usable, a point that is the most fundamental in all purchase decisions, yet also the easiest to overlook in spec comparisons.