In this story
- What You Cannot Delete
- Why Storage Categories Are Not Cleanup Commands
- Air and Pro Capacity Options
- Judging Memory, SSD, and Cloud Capacity Separately
- Real Steps and Limitations of Moving a Photo Library to an External Drive
- Why an Empty Library Appears When the Drive Is Not Connected
- iMovie Projects and Media Ownership
- Confirming You Have Opened the Correct Copy After Migration
- Time Machine Backup Drives, Recovery, and Retention
- What Roles Sync, Move, and Backup Each Fulfill
- Preparing Offline Materials for Business Travel
- Forming Your Own Capacity Choice Based on Current Files and Associated Costs
What You Cannot Delete
When you open System Settings > General > Storage on a Mac, you see a colored bar dividing usage into categories such as Applications, Documents, Photos, Messages, and System Data [3]. The interface is designed to give you a quick understanding of what occupies your space, but it is not a cleanup command and does not offer a one-click button to free up space. Many people feel confused in this interface because the "System Data" or "Other" category looks large, yet there is no direct way to delete it. The source of this confusion is that System Data is not a trash bin you can discard as a whole; it is a catch-all category for files that cannot be classified into more specific groups [3]. You cannot infer from this catch-all that every file inside it is safe to delete. Apple explains that the system will clean up some cache and log files that are safe to remove when space is needed [3][4]. If you try to free up space by deleting the "System Data" category from this interface, you are essentially chasing a moving target, because the system may regenerate caches at any time or reclassify certain files.
Old iPhone backups are another major space consumer, but you need to confirm two things before deleting them: first, whether the backup belongs to a device you still use; second, whether you have already backed up your phone data through another method. The Finder on macOS can manage iOS device backups, and you can view the backup list and dates in Finder [3]. Backups from old devices may still hold old data you uniquely need; you should verify the specific contents and confirm independent copies exist before deciding to delete. If this is your only phone backup, deleting it means data cannot be recovered if something goes wrong with the phone. This judgment must be made by you, because only you know what your backup strategy is.
The Trash is an easily overlooked detail. The Trash in macOS is a temporary holding area; files moved to the Trash do not immediately free up space until you manually empty the Trash or enable the option to "automatically remove items from the Trash after 30 days" [3][4]. This means that if you delete a large number of files but see no change in available space, the first thing to check is whether the Trash has been emptied. Automatic Trash emptying is an optional feature; when enabled, the system will automatically delete items in the Trash after 30 days, which prevents the Trash from occupying space long-term but also means you have a 30-day window to change your mind. Items older than 30 days will be automatically removed after you enable this option; you should not treat it as a guarantee that all accidental deletions can be recovered. This option should not be blindly turned on as a magic switch to "automatically free up space," because it only affects the Trash, not System Data or other categories [4].
Why Storage Categories Are Not Cleanup Commands
The Storage interface in macOS divides usage into several categories. The original intent of this design is to help you understand what occupies your space, not to provide a set of cleanup instructions. When you see that "System Data" takes up a lot of space, your intuitive reaction is "there must be junk in here, I need to delete it," but the System Data category itself is a fallback classification that contains all files that cannot be placed into specific categories like Applications, Documents, Photos, or Music Creation [3]. The composition of this category changes depending on the system version, installed applications, and usage habits; there is no fixed cleanup formula. Apple's official support document explicitly states that System Data contains files that cannot be classified into more specific categories, not "junk you can delete entirely" [3]. This means that part of the usage you see in this category is necessary for the system to function normally, and only another part consists of temporary files that can be cleaned. But the system interface does not distinguish between the two, and you cannot tell directly from the colored bar which files are safe to remove.
A practical consequence of this design is that you can easily mistake the Storage interface for a task list, assuming every category should be reduced. In reality, some categories are naturally supposed to occupy large amounts of space. For example, a video editor's "Documents" category may take up hundreds of gigabytes, which is normal working files, not a problem that needs cleaning. A photographer's photo library may occupy over 1TB, which is also normal data, not a sign that the system has a problem. The Storage interface serves to show the current state, not to imply that you should compress every category. You need to judge for yourself which usage is reasonable and which is not, and this judgment depends on your understanding of your own workflow, not on the categories the system provides.
Another common misunderstanding is treating iCloud storage optimization as an extension of local space. The "Optimize Mac Storage" feature in macOS can, when local space is low, automatically remove watched Apple TV shows, older email attachments, and replace original files in iCloud Drive and iCloud Photos with placeholders that download from the cloud when needed [4]. This feature can significantly reduce local usage, but it has a prerequisite: you must have a stable network connection and enough cloud space in your iCloud account. If a needed original file has not been downloaded and there is no network, cloud visibility cannot be equated with local availability. More importantly, optimized storage does not mean you locally possess the files. You see a file icon on the desktop, double-click to open it, and the system downloads it from the cloud in the background; this process may be transparent to you, but if the network disconnects at that moment, the file will not open. Therefore, optimized storage is a space management strategy, not a local capacity expansion solution. When deciding whether to enable this feature, you need to evaluate your work scenario: whether you frequently work offline, whether you need to access all files without a network connection, and whether your iCloud space is sufficient to hold all original files. The answers to these questions vary from person to person, but the core principle is: cloud capacity does not equal local offline capacity [4].
Finally, the "Documents" category in the Storage interface is a classification that can easily mislead. This category contains files not covered by other specific categories, such as installers in the Downloads folder, scattered files on the desktop, non-iCloud files in the Documents folder, and so on. But this classification is not precise; some files may fit the definition of multiple categories, and the system assigns them to one based on internal rules. You cannot assume that all files in the "Documents" category are old files safe to delete, because this category may contain ongoing project files, scanned contracts, financial records, and other critical data. Before cleaning this category, you need to check file contents one by one rather than batch-deleting based on file type or modification date. The categories the system provides are only a reference framework; the final judgment rests with you, because only you know which files are currently in use and which have been archived.
Air and Pro Capacity Options
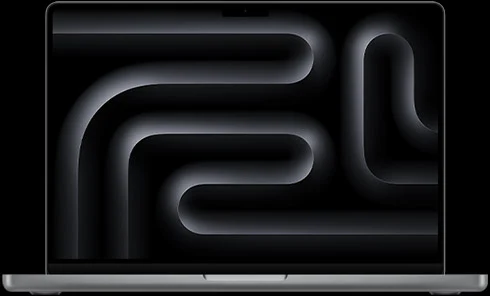
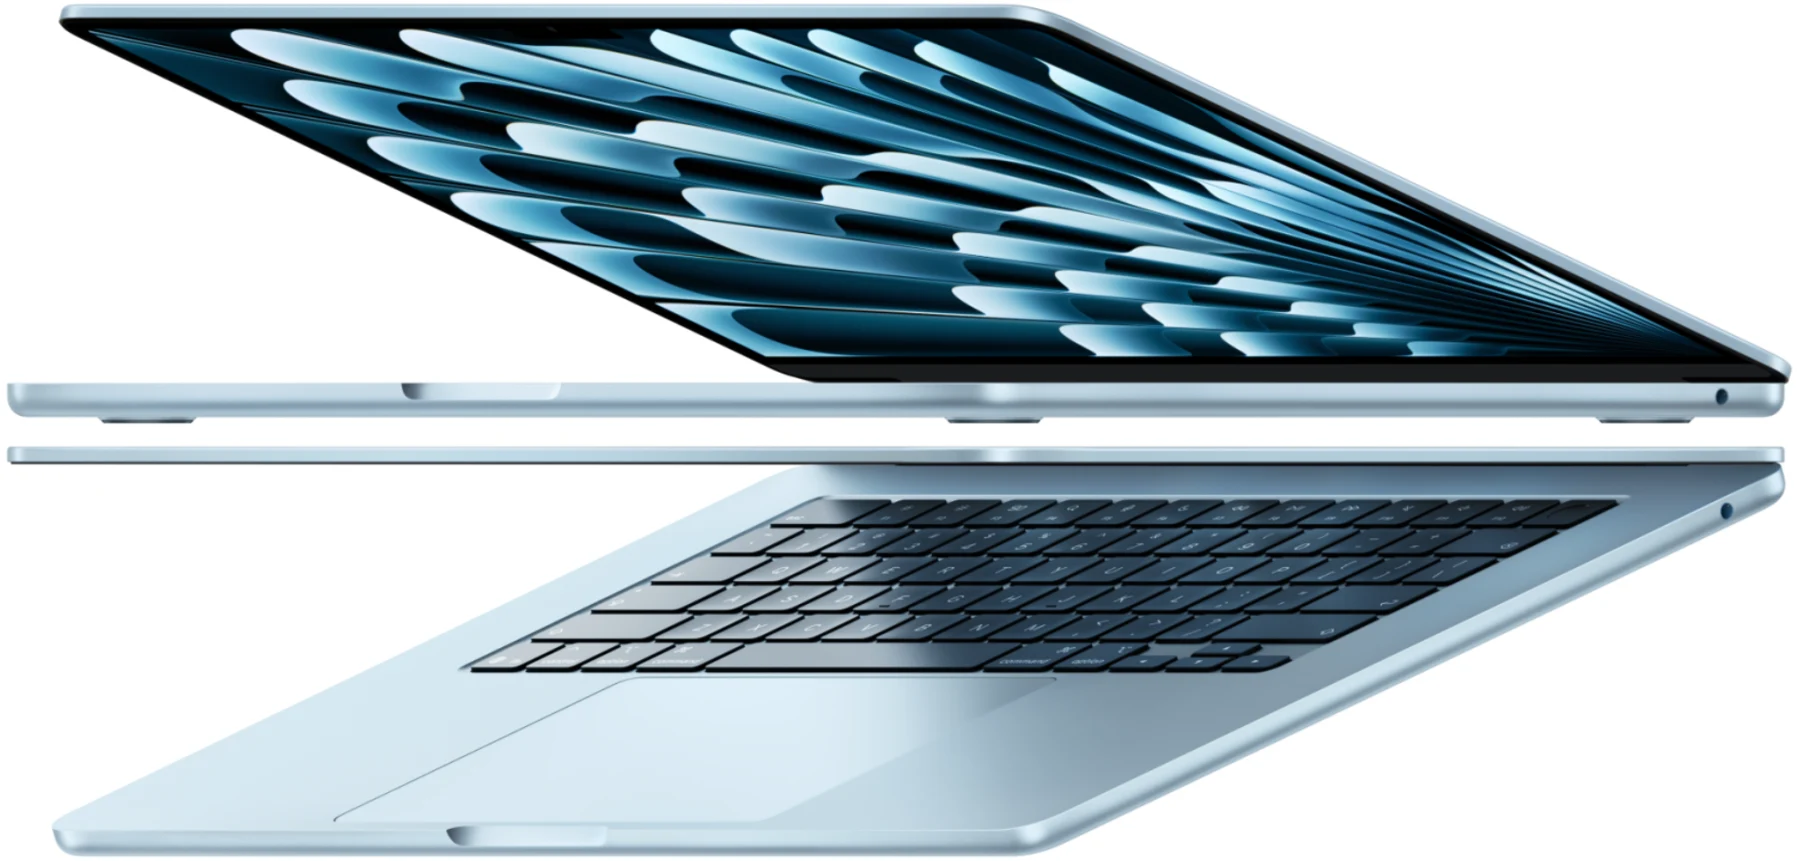
Choosing between a MacBook Air and a MacBook Pro involves a capacity decision that cannot be reduced to “the Pro has a larger SSD so it’s better value.” The current 13-inch M5 MacBook Air starts with a 512GB solid-state drive, configurable to 1TB, 2TB, or 4TB; memory options are 16GB, 24GB, or 32GB[1]. The 14-inch base M5 MacBook Pro starts with a 1TB SSD, configurable to 2TB or 4TB[2]. On paper, the Pro’s starting capacity is indeed one tier higher than the Air’s, but the price difference between these two product lines is not solely determined by SSD capacity. It also encompasses the display, cooling system, ports, speakers, and other dimensions[2]. If you are considering the Pro simply because you feel 512GB is insufficient, you need to first calculate: the cost of upgrading the Air from 512GB to 1TB versus the price difference of buying the 1TB-starting Pro directly, whether this falls within an acceptable budget range, and whether the Pro’s additional hardware features are genuinely needed. This calculation has no universal answer because budget constraints and usage scenarios vary, but the core principle is: do not directly convert capacity anxiety into a reason to buy a higher-end model, unless the other improvements that model brings are equally valuable.
The Air’s 512GB starting capacity is a threshold that requires careful evaluation for many of you. If your workflow primarily involves documents, spreadsheets, and presentations, supplemented by a moderate amount of photos and a small amount of video, you should judge based on your actual usage whether 512GB is sufficient. However, if you need to retain large photo libraries, multiple virtual machines, large design files, or video assets long-term, you need to specifically verify how much local space this data occupies. At this point, the choice you face is whether to upgrade to 1TB or higher at the time of purchase, or to rely on external storage for expansion. This choice involves a key judgment: do you need locally available capacity at all times, or can you accept having some data stored on an external drive and connecting it when needed. If you frequently work in mobile scenarios, such as on airplanes, in cafes, or in clients’ meeting rooms, the experience of needing to plug in an external drive every time you access large files will significantly impact efficiency. Conversely, if you use your Mac at a fixed workstation most of the time, external storage is an alternative that can be compared more practically. This judgment must be made before purchase; do not assume that the purchased model can have its SSD upgraded later. Verify against the official configuration options and actual service conditions first.
Judging Memory, SSD, and Cloud Capacity Separately
In Mac configuration choices, memory, solid-state drives, and cloud capacity are three concepts frequently conflated, but their functions are completely different, and the decision logic should be kept separate. Memory is the temporary workspace used when running programs; capacity is only one condition among operational requirements and cannot independently guarantee a lack of lag. The SSD stores local files but does not guarantee permanent reliability; it determines how many files can be stored locally. Cloud capacity is the network storage provided by iCloud; it determines how much data can be stored on Apple’s servers, but accessing this data requires a network connection[4]. The confusion among these three often occurs when you try to use cloud capacity to compensate for insufficient local SSD space, or conversely, assume that buying a large-capacity SSD means you don’t need to manage cloud space. In reality, each has its own independent constraints.
The role of cloud capacity is entirely different. iCloud provides a synchronization and offloading mechanism, not a direct expansion of local capacity. When you enable “Optimize Mac Storage,” macOS will, when local space is tight, replace original files in iCloud Drive and iCloud Photos with placeholders, downloading them from the cloud when needed[4]. This feature allows you to see cloud materials and download them when necessary; it does not expand the 512GB of local physical capacity, but the trade-off is that you must maintain a network connection and have enough cloud space in your iCloud account to hold all original files. If your iCloud space is only 200GB, but your photo library is 300GB, then optimized storage cannot help at all, because the cloud cannot hold all the original files. In this case, you must either upgrade your iCloud storage plan or accept keeping the complete library locally. This decision chain illustrates that cloud capacity, local SSD, and iCloud storage plans are three variables that need to be considered in coordination; a shortfall in any one link will limit the effectiveness of the overall strategy.
Another scenario requiring separate judgment is when you may own multiple Apple devices, with iCloud syncing data among them. In this situation, the local SSD capacity on one Mac determines how much data that device can access offline, while the iCloud capacity determines the size of the cloud data pool shared by all devices. If you delete a file on your Mac, this deletion operation will sync to other devices via iCloud; an independent backup provides another recovery path but will not prevent the sync itself[4]. This means that iCloud’s sync mechanism makes local capacity management require more caution: a file deleted to free up space on one device may disappear on all devices. Therefore, when iCloud sync is enabled, cleaning local capacity cannot only consider the space usage of the current device but must also consider the impact of this operation on the cloud data pool and other devices. This complexity is another reason why local SSD and cloud capacity cannot be conflated.
For you considering purchasing a new Mac, the memory and SSD configurations are locked in at the time of order, while cloud capacity is a subscription service that can be adjusted at any time later. This difference in time dimension means you should compare the local machine quote, required local capacity, and ongoing service costs together, because the cloud storage plan can be flexibly adjusted according to actual needs during use. But this also means that if you underestimate the size of your local working set and choose an SSD that is too small, you can only compensate later through external storage or more aggressive space management, both of which bring compromises in user experience. Therefore, the capacity assessment before purchase requires you to honestly examine your data workflow, rather than hoping that some future optimization technique will solve a fundamental capacity shortage.
Real Steps and Limitations of Moving a Photo Library to an External Drive
Moving your photo library from your Mac's internal SSD to an external drive is a direct way to free up local space, but this process comes with a strict set of prerequisites that should be checked against Apple's documentation one by one. The first prerequisite is the format of the external drive. Apple's official documentation explicitly requires that an external drive used to store a photo library must be formatted as APFS or Mac OS Extended (Journaled) format[5]. This means that if you have a portable hard drive that came factory-formatted as ExFAT, FAT32, or NTFS, you cannot simply drag the library onto it and start using it. You should choose a drive with a compatible format; if you consider reformatting, protect your existing data first, or you could use a different drive instead. This operation will erase all existing data on the external drive, so before formatting, you must confirm that the drive contains no files you need to keep, or that you have already copied those files to another safe location. This is not a step you can skip, nor is it something you can fix after the fact.
The second prerequisite concerns the type of external drive. Apple explicitly lists several storage media that cannot be used to store a photo library: SD cards, USB flash drives, network-attached storage locations, cloud storage, and disks currently being used for Time Machine backups[5]. These are the usage boundaries Apple has provided; this article has not tested various media types and does not speculate on file system reasons that the manufacturer has not explained[5]. When choosing an external drive, you need to check against these restrictions one by one, rather than assuming that any storage device you can plug into your Mac can be used to hold the library.
The actual steps for the transfer are not complicated in themselves, but the order is critical. You need to first quit the Photos app, then locate your current photo library file through the Finder. The default location is in your "Pictures" folder, and the file is usually named "Photos Library.photoslibrary" or something similar[5]. Copy this entire file to the external drive that has already been formatted to a compatible format. Once the copy is complete, do not immediately delete the library from its original location. The correct approach is to double-click the library file in the new location to open it; if you need to choose a different library, quit Photos, then hold down the Option key while reopening the Photos app to manually select the library file on the external drive, confirming that it opens normally and that the photos and content you need are accessible in the new location[5]. Only after completing this verification step should you consider deleting the original library file to free up space. If you delete the original library before verification, and the copy on the external drive cannot be opened for some reason or the data is incomplete, you will lose all your photo data unless you have a separate, independent backup.
For those of you who use iCloud Photos, moving the library to an external drive involves an additional setup step. macOS allows you to designate a "System Photo Library," which is the target for iCloud photo syncing and the default library accessed by other applications through the photo picker[5]. If you move your library to an external drive, you need to designate the library in the new location as the System Photo Library in the Photos app's settings for iCloud syncing to continue within the library on the external drive. If you do not perform this step, the system may still treat the library in the original location as the System Photo Library, leading to confusion in syncing behavior or making the latest photos invisible in other applications. When using iCloud Photos or the photo picker in other apps, you should confirm the System Photo Library by following the official steps.
After moving the library to an external drive, your usage habits will need to adjust accordingly. A library on an external drive can only be opened when the drive is connected to the Mac and recognized by the system. If you open the Photos app without the external drive connected, the app will not find the library. It will not report an error and wait for you to connect the drive; instead, it will automatically create a new, empty photo library in the default "Pictures" folder[5]. This behavior is by design in the Photos app, not a system malfunction, but it can lead to a serious misjudgment. You see the Photos app open, and it is completely empty. You might think all your photos are lost, when in reality, the original library is intact on the unconnected external drive. To regain access, you need to quit the Photos app, connect the external drive, confirm the drive is visible in the Finder, then hold down the Option key while reopening the Photos app to manually select the library file on the external drive. This workflow requires you to clearly remember the location of your library, rather than relying on the default behavior of the Photos app.
Why an Empty Library Appears When the Drive Is Not Connected
The Photos app's behavior of automatically creating a new, empty library when it cannot find the designated one is a key point in understanding the experience of using an external library. The logic of this behavior is that the Photos app must have a library to open upon launch; this article does not infer the app's internal implementation from this result. If your designated library is on an external drive and that drive is not connected, the app cannot find the library file in the default location and will create a new, empty library in your "Pictures" folder, using it as the current working library[5]. This new library is a completely blank database, containing no photos, albums, or project data. What you see is an empty Photos app interface, with all content gone.
The appearance of this empty library does not mean the original library has been deleted or damaged. The empty library itself cannot indicate that the original library on the external drive is corrupted; you would still need to check the original file after connecting the device. The issue is simply that the app is not currently pointing to it. The key problem is that if you perform any operations in this empty library—such as importing new photos, creating albums, or editing pictures—these actions will be written into this new, empty library, not into the original library on the external drive. When you later connect the external drive and switch back to the original library, all the changes made in the empty library will not appear in the original library, because they are two completely independent databases. This leads to data being scattered across two libraries, requiring you to manually figure out which photos are in which library and then merge or migrate them, a process that is both time-consuming and error-prone.
This automatic creation of an empty library also means you cannot simply judge the state of your library by whether the Photos app opens normally. If you are unsure which library is currently open, you can quit the Photos app while it is open, connect the external drive, and then open the library again from the confirmed new location to verify the file path of the library currently in use[5]. This check step is especially important when switching libraries after reconnecting an external drive, because you might forget which library you were last working in and need to actively confirm that the path of the current library points to the correct file on the external drive.
iMovie Projects and Media Ownership
The iMovie library structure has similarities to the Photos library but follows a different internal logic. An iMovie library is a package that contains projects, media files, and render data. Apple describes the library as a collection containing projects, associated media, and data, and specific migration should follow the official documentation [6]. This means you cannot simply open the library package in Finder, drag out a specific video clip to use elsewhere, and expect the iMovie project to still locate it normally. iMovie maintains strict management over the internal file structure of the library, and manually interfering with files inside the library package can cause project corruption or broken media links. Therefore, when you need to migrate an iMovie library to an external drive, you must handle the entire library file as a single unit and cannot copy only a portion of it.
The steps for migrating an iMovie library to an external drive are similar to those for the Photos library, but there are several key differences. The first prerequisite is again the format of the external drive: it must be formatted as APFS or Mac OS Extended (Journaled). You cannot use an SD card, USB flash drive, network share location, or cloud storage, nor can you place it on a device currently being used for Time Machine backups [6]. These are the applicable conditions from the iMovie documentation itself, and you cannot infer that all video software follows the same rules. Before formatting the external drive, you must confirm that the drive contains no data you need to keep, or that you have already copied that data to another safe location. The formatting operation will erase all existing content on the drive, and this is an irreversible step.
Before migration, you need to quit the iMovie application, then use Finder to locate the current iMovie library file and copy it in its entirety to an external drive already formatted with a compatible format [6]. After the copy completes, do not immediately delete the library from its original location. The correct verification step is: double-click the library file on the external drive, open it from the new location as specified by the official documentation, and confirm the content. Verify that it opens normally and that all projects, media assets, and timeline edits are intact [6]. Only after completing this verification should you consider deleting the library file from the original location to free up space. If you delete the original library before verification, and the copy on the external drive cannot be opened due to an interrupted copy process or file corruption, you will lose all iMovie projects and media unless you have a separate independent backup. This risk requires particular attention when copying large libraries. This article does not measure copy times; you should confirm that the operation has completed and that the content at the new location is usable.
Confirming You Have Opened the Correct Copy After Migration
iMovie's behavior when it cannot find the designated library is similar to the Photos app, but with one important difference. When you open the iMovie application and the library it last used is on an external drive that is not connected, iMovie will automatically create a new empty library in the default "Movies" folder and use this as the current working library [6]. This new library is a completely blank database containing no projects or media assets. What you see is an empty iMovie interface, and all previous projects appear to be gone. The appearance of this empty library does not mean the original library has been deleted. The new empty library does not prove that the original is damaged; reconnect and check the original file; iMovie simply is not currently pointing to it.
This behavior of automatically creating an empty library can lead to a serious confusion: you open iMovie without the external drive connected, see an empty interface, and may assume your projects are lost, then begin creating new projects or importing new media into this empty library. When you later connect the external drive and switch back to the original library, none of the content created in the empty library will appear in the original library, because they are two completely independent library files [6]. This results in your iMovie projects being scattered across two different libraries, requiring you to manually determine which projects are in which library and then migrate or merge them. If content has already become scattered, keep both libraries and handle the situation according to iMovie's official instructions on moving clips, events, and projects between libraries. Do not delete one of them first.
Therefore, when you open iMovie after reconnecting the external drive, you must actively confirm which library file is currently open. The method for confirmation is to open the iMovie library file from the external drive whose location you have already confirmed in Finder, and verify that the needed projects and media are present [6]. This verification step cannot be omitted, because iMovie does not prominently indicate the current library's location in the interface, and you can easily work in the wrong library without realizing it. If you are uncertain about the current library's location, the safest approach is to quit iMovie, connect the external drive, confirm the drive is visible in Finder, and then double-click the confirmed iMovie library file on the external drive. This manual selection process ensures you know exactly which library you are opening.
Time Machine Backup Drives, Recovery, and Retention
Time Machine is the built‑in backup mechanism in macOS, and it works in a fundamentally different way from manually copying files or using a sync service. Time Machine automatically backs up the apps, music, photos, mail, documents and other data on your Mac to a designated external storage device on a schedule, and the backup includes both the current state of files and their historical versions[7]. This means that if you delete a file by mistake, or if you make an incorrect edit to a document and save it, you can go back to an earlier point in time through Time Machine and retrieve the previous version. The precondition for this capability is that the backup drive was connected at the time of the backup and the backup process completed normally. If you only discover that the backup drive has not been connected for months when you need to recover a file, or if the backup was interrupted because the drive ran out of space, then the protection Time Machine can offer is limited to the point of the last successful backup.
When choosing a Time Machine backup drive, Apple recommends that the capacity of the backup device be at least twice the built‑in storage capacity of your Mac[7]. The reasoning behind this recommendation is that Time Machine not only keeps a full copy of your current data but also retains historical versions. How much history can actually be kept also depends on the volume of source data and how much it changes; you cannot rely solely on the nominal capacities of two drives to guarantee a result. The two‑times capacity figure is a recommendation, not a hard requirement, and you can adjust it according to your own need for historical versions. Whether a different capacity is suitable should be judged against actual data and system prompts; no guarantee can be made that a particular small drive will work. You need to understand, however, that reducing the backup drive capacity means sacrificing the number of historical versions—this is a trade‑off between capacity and depth of protection, not a system‑enforced restriction.
When you configure a Time Machine backup drive, macOS may require you to erase the existing data on the external drive and format it with a compatible file system[7]. Erasure removes existing contents; do not rely on recovering them afterward, and protect needed files first. Therefore, before you use any external drive as a Time Machine backup drive, you must first confirm that the drive contains no data you need to keep, or that you have already copied that data to another safe location. This confirmation step cannot be omitted, and you cannot assume the drive is empty. Many external drives come preloaded with the manufacturer’s backup software or utilities, and these will also be erased during formatting. If you are unsure whether the drive holds important data, the safest approach is to connect the drive to your Mac first, check its contents in the Finder, and only proceed with Time Machine setup after you have confirmed the situation. If the drive contains files you need to keep, you must first copy them to another storage device before handing the drive over to Time Machine.
There is a strict limitation on the use of a Time Machine backup drive: it cannot share the same physical drive with a Photos library or an iMovie library[5][6]. Apple’s official documentation explicitly prohibits placing a Photos library or an iMovie library on a storage device that is used for Time Machine. Do not try to explain this restriction with guessed locking or corruption mechanisms; simply follow the scope of the library documentation. You therefore need to prepare a dedicated external drive for Time Machine, and you should not use the advanced note that you can create a separate APFS volume on a Time Machine drive for general files to override the specific restriction concerning Photos and iMovie libraries.
Time Machine’s backup schedule is automatic. Under the default settings, backups from the past 24 hours are kept hourly, backups from the past month are kept daily, and older backups are kept weekly[7]. When the backup drive runs out of space, Time Machine automatically deletes the oldest backups to make room for new ones. This automatic deletion mechanism means that Time Machine backups are not kept permanently. You cannot assume that a particular version of a file from a year ago is still on the backup drive, because if the backup drive capacity was limited, the system may have already automatically cleaned up that version. You need to roughly estimate how long historical versions can be retained based on the actual capacity of your backup drive and the total volume of data being backed up. If you need to archive certain historical versions of files for the long term, Time Machine is not a tool designed for that purpose; you need to use a separate manual archiving method, copying the specific versions of files to another storage medium for long‑term safekeeping.
Encrypted backup is an optional feature of Time Machine. You can choose to encrypt the backup when you set it up and set a password. This password is used to protect the backup data and is required when you restore[7]. The advantage of an encrypted backup is that even if the backup drive is lost or stolen, no one without the password can read the backup contents. The cost is that if you forget the password, the backup data cannot be recovered. The official reminder states that the password is required for recovery; you cannot treat an encrypted backup for which the password has not been recorded as a verified recovery method. Therefore, if you enable encrypted backup, you must record the password in a secure place where it will not be lost, and you cannot rely on memory. This password is independent of your Apple ID password; resetting your Apple ID password will not affect the password for your Time Machine encrypted backup.
The first Time Machine backup may take a long time because the system needs to copy all the data on your Mac to the backup drive in full[7]. The exact duration depends on the total volume of data on your Mac’s built‑in storage, the read‑and‑write speed of the backup drive, and the connection method; Apple does not provide a fixed time expectation. You can use your Mac normally during the first backup, which runs in the background, but system performance may be affected to some degree. If you need to rely on Time Machine for protection before the first backup is complete, that expectation is unrealistic, because an incomplete first backup means the backup drive does not yet hold a full copy of your data. You should wait for the first backup to finish and confirm in Time Machine system settings that the backup status is normal before you treat Time Machine as an effective means of protection.
What Roles Sync, Move, and Backup Each Fulfill
Sync, move, and backup are three different data‑management operations, each fulfilling a distinct role, and they cannot substitute for one another. Confusing the roles of these three is a common cause of data loss. Sync refers to keeping files in a consistent state across multiple devices through a cloud service. iCloud Photos, iCloud Drive, and the Desktop and Documents folder sync are all sync mechanisms[4]. The core characteristic of sync is that changes made to a file on one device—including deletions—propagate over the network to all devices participating in the sync. This means that if you delete a photo on your Mac, that deletion will sync through iCloud to your iPhone and iPad, and the photo will be deleted on all devices. What sync provides is not backup protection but a convenience feature that lets you access the same files on different devices. If you delete a file by mistake, the sync mechanism will faithfully propagate the mistaken deletion to all devices, rather than protecting the file from being deleted.
Move refers to transferring a file from one storage location to another, where the file at the original location is no longer kept after the move is complete. Dragging a file across disks in the Finder is usually a copy operation, and the original location still retains the file; do not mistake the copy interface as having already deleted the source file. A move operation does not create an additional copy by itself; it merely changes the storage location of the file. If you make an operational mistake during the move—for example, disconnecting the external drive before the file has been completely written to it, or if the external drive fails during the move—the file may be lost from both the original location and the external drive. The risk of a move operation is that it provides no redundancy protection; during the move, the file exists as only one complete copy, and if that copy is damaged during the transfer, the data is lost. Therefore, for irreplaceable important files, you should first copy, verify, and then delete the original file, rather than moving it directly.
Backup refers to creating an independent copy of a file, stored on a different physical medium from the original, with the purpose of being able to recover the file if the original is lost, damaged, or mistakenly deleted. Time Machine is one implementation of a backup mechanism[7]. The core characteristic of backup is that the relationship between the original file and the backup copy is a one‑way copy; a deletion operation on the original file does not automatically propagate to the backup copy. If you delete a photo on your Mac, that photo on the Time Machine backup drive is not automatically deleted, unless the system automatically cleaned up the old backup snapshot containing that photo when the backup drive ran out of space. The depth of protection a backup provides depends on the frequency of the backup and the retention period. Your recovery point depends on the last successful readable backup; a chosen schedule does not guarantee every scheduled run completed. Backup cannot prevent data loss from occurring, but it can provide a path to recovery after the loss has happened.
For you, if you use an external drive to store a Photos library or an iMovie library, the distinction between sync, move, and backup becomes even more important. Copying the library to an external drive only creates a copy at the new location; whether to delete the original file is a separate, deliberate choice made after verification is complete. Only after you deliberately remove other local copies might that external library become the sole local copy. If you do not make an independent backup of this library on the external drive, then once the external drive is damaged, lost, or suffers a file‑system error, you may lose the available copies of those photos. iCloud sync can offer a degree of protection in this scenario, but only on the condition that the library on the external drive is designated as the System Photo Library, iCloud sync is operating normally, and the cloud holds all the original files. However, as noted earlier, iCloud sync is not a backup; if you mistakenly delete a photo before the external drive is damaged, the cloud will also sync the deletion. The correct approach, therefore, is that the library on the external drive still needs to be included in your backup strategy—for example, by backing it up via another external drive using Time Machine, or by using another backup tool to regularly create independent copies of the library file.
The role of sync services in a mobile scenario also needs to be clarified. When you travel, iCloud Drive can let a file you edit on your Mac automatically appear on your iPad or iPhone; this is a convenience feature. But if you have no network connection while you are away, or if iCloud storage is full and sync stops, the latest version of the file may exist only on one device. At that point, if that device is lost or damaged, the unsynced changes may be unrecoverable. Relying on a sync service as the sole means of data protection for mobile work therefore carries a clear risk window. You need to confirm before you travel that all important files have finished syncing, or keep an extra copy locally. This confirmation step is not something the system does automatically; you need to actively check the iCloud status to ensure there are no unuploaded changes.
Finally, the effectiveness of a backup needs to be verified through a recovery test. The fact that a backup drive stores backup data does not guarantee that the data can actually be recovered when needed. A backup drive can become unreadable due to physical damage, file‑system errors, a forgotten encryption password, and other reasons. You can incorporate a recovery check that you find acceptable into your backup routine, confirming that the backup drive is working normally and the data is intact and readable. This test does not need to be performed frequently, but not doing it at all means you accept the risk of discovering that the backup is invalid at the moment you truly need to recover. This risk deserves particular attention when you have used the same backup drive for a long time, because external drives have a finite lifespan; mechanical hard drives can be damaged by head failures, and the long‑term reliability of different storage devices needs to be assessed according to specific product conditions—this article makes no lifespan predictions. The backup drive itself is a consumable item and needs to be replaced promptly when signs of failure appear.
Preparing Offline Materials for Business Travel
Preparing offline materials before a business trip is fundamentally about answering one question: without network access and without the external drives sitting at home, what must be stored on this Mac to ensure work continues uninterrupted. The answer depends on what work you will do during the trip, not on a universal file checklist. You need to first clarify which projects you will handle, what reference materials you need, and which software you might use, then work backward to identify the file collection those tasks require. This backward reasoning cannot rely on the assumption that you can download whatever you need from the cloud later, because network conditions during travel are uncontrollable—hotel Wi-Fi may be slow, client sites may lack guest networks, and there may be no usable connection while in transit. If a file is not downloaded locally before departure and you discover it cannot be opened when needed, that file effectively does not exist for the duration of the trip[4].
The first step in determining the offline file collection is to check whether all files that depend on iCloud sync have been fully downloaded locally. If you have enabled "Optimize Mac Storage," files in iCloud Drive and iCloud Photos may exist only as placeholders, with the originals stored in the cloud[4]. Before departure, you need to verify for each folder and photo library required during the trip that the necessary content has been downloaded, and you cannot treat photo settings as the same button as Finder folders. This verification cannot rely solely on whether file icons appear normal, because macOS may still be downloading in the background. You can check file sizes in Finder or attempt to open files while disconnected from the network to verify they are fully available. If a file cannot be opened after disconnecting, the original has not yet been downloaded locally and must be completed before departure. This verification step requires time—especially for large photo libraries or video assets, downloads may take hours—so you should begin preparation a day or two before departure rather than rushing through it the night before.
For those using external libraries, preparation before travel involves an additional decision: whether to bring the external drive along or temporarily move the library back to the internal SSD. If your external Photos library or iMovie library is not large and the internal SSD has enough space to accommodate it, copying the library back to the internal SSD is the safer choice, because carrying one fewer external drive means one fewer physical device that could be lost or damaged. The copy operation must follow the same verification steps as migration: first copy the library file to the internal SSD, open the library file from the new location according to the corresponding application's official method, confirm all content is intact, retain the external copy and verify whether it still serves backup or archival duties, and do not delete it for the sake of a temporary trip[5][6]. If the library is too large and the internal SSD cannot hold it, you must carry the external drive. In this case, you need to ensure you have all necessary cables and adapters for the external drive, and exercise extra caution regarding the drive's physical safety while traveling—avoiding drops, crushing, or liquid spills. At the same time, you must make an independent backup of the library files on the external drive before departure, stored on another drive left in a secure location, to prevent total data loss if the external drive is damaged during the journey.
New data that may be generated during the trip must also be factored into the preparation plan. You need to consider how many photos you will take, how many videos you will record, and how many new documents you will create during the trip, and how much local space this new data will require. If the remaining space on the internal SSD is insufficient to accommodate the expected new data, you need to clear enough space before departure or carry an additional external drive for storing newly created materials. The space-clearing step cannot be left to the last minute, because hastily deleting files is error-prone, and deletion operations may trigger iCloud sync, affecting data on other devices[4]. You should begin organizing space at least a week before departure—deleting files confirmed to be no longer needed, transferring archived data to an external drive, emptying the Trash, and then observing for a few days to confirm the system runs normally and no important files were mistakenly deleted.
Another easily overlooked preparation item is the offline availability of software. Some professional applications depend on online verification or cloud resource libraries—such as design tools requiring account login, video editing software needing downloaded asset libraries, or plugins requiring online activation. Before departure, you should open every application you will need during the trip and confirm it can start and function normally while disconnected from the network. If an application enters a restricted mode or refuses to start when offline, you need to contact the software vendor in advance to understand the conditions for offline use or prepare alternatives. This check cannot assume that "it worked on a plane before," because software updates may have changed offline policies, and you need to actually disconnect from the network and test once before departure.
The backup strategy during the trip also needs advance planning. If you normally rely on Time Machine backups and the Time Machine backup drive is a desktop hard drive left at home, you cannot treat the latest backup left at home as already containing new content added during the journey. In this case, you have two options: carry a portable backup drive and continue performing Time Machine backups during the trip, or accept the risk of having no backup during the trip but ensure the latest backup before departure is complete, so that even if data is lost during travel, at least the pre-departure state can be restored. If you choose to carry a portable backup drive, you need to confirm that this drive has completed a full backup before departure and that the drive's format and connection method are compatible with the Mac used during the trip. If you choose not to carry a backup drive, you should exercise extra caution regarding data security during the trip and avoid large-scale file organization or deletion operations when only one copy exists.
Forming Your Own Capacity Choice Based on Current Files and Associated Costs
After the discussions across all preceding sections, you now face a concrete decision: when purchasing a Mac, or when managing the storage of an existing Mac, what internal SSD capacity should you choose. This decision cannot be reduced to "bigger is always better" or "save money by buying a smaller one and use external drives," because both extremes ignore the constraints of your actual workflow. Forming your own capacity choice requires you to honestly answer three questions: first, how large is your local working set; second, to what degree can you accept dependence on external drives; and third, what does your data growth curve look like.
The degree of dependence on external drives is the second dimension requiring evaluation. This assessment is not a simple "can I accept plugging in an external drive," but requires you to specifically analyze your frequency and scenarios of mobile work. If you use your Mac at a fixed workstation 90% of the time and the external drive can remain plugged in, then the inconvenience caused by an external drive is minimal, and you can choose a smaller internal SSD paired with a large-capacity external drive. If you use your Mac in meeting rooms, cafés, client sites, or on transportation three days a week, and plugging in an external drive each time is an extra action, and the external drive is prone to loosening, loss, or damage while mobile, then the internal SSD capacity should cover your working set as much as possible to reduce dependence on external drives. If you frequently work on airplanes, you should practically consider whether placing and connecting an external drive is convenient before deciding which materials remain on the internal SSD. This assessment requires you to review your actual work scenarios over the past several months, rather than basing it on an idealized "maybe later" assumption.
Associated costs are an economic factor that cannot be ignored in capacity decisions. The upgrade cost for internal SSD is paid once at the time of purchase, while external storage is an expense that can be flexibly added later. You need to compare the total cost of these two approaches over the expected lifespan of the device. If you plan to use this Mac for four years, compare the price of upgrading a MacBook Air from 512GB to 1TB, amortized over four years, against the price of purchasing a 1TB external SSD, and see which better fits your budget constraints[1]. This comparison cannot look only at price figures; it must also convert the inconvenience of using an external drive into implicit costs. If you reduce backup frequency because of the inconvenience of an external drive, or if work is delayed because you forgot to bring the external drive, these implicit costs may far exceed the upgrade cost of the internal SSD. Conversely, if an external drive causes almost no inconvenience in your work scenarios, then saving the internal SSD upgrade cost and using a lower-cost external drive to expand storage is the more economical choice.
The subscription cost for cloud capacity is another associated cost that needs to be factored into the calculation. If you choose a smaller internal SSD and rely on iCloud Optimized Storage to manage local space, you need to ensure the iCloud storage plan is sufficient to hold all original files[4]. The monthly or annual fee for the iCloud storage plan, accumulated over the device's lifespan, is also an ongoing expense. You need to compare this expense against the one-time cost of upgrading the internal SSD. If you are already paying for a 2TB iCloud plan that serves multiple devices simultaneously, shifting part of the Mac's local capacity needs to the cloud may be a lower marginal cost approach. However, if the existing cloud plan is insufficient, the cost of a new subscription should be calculated based on actual regional pricing and the expected usage period, and you cannot assume a cloud plan is always cheaper. This calculation requires you to check your current iCloud subscription status and actual usage, rather than assuming cloud storage is free.
For those who already own a Mac, the capacity choice question becomes an adjustment of capacity management strategy. You need to develop a sustainable space management plan based on the current actual occupancy of the SSD, combined with the previously discussed methods such as external library migration, Time Machine backup, and iCloud Optimized Storage. The core of this plan is to clarify which data resides on the internal SSD, which on external drives, which in the cloud, and what the backup strategy is for each type of data. If you find that the current internal SSD capacity is severely insufficient and neither external drives nor cloud solutions can resolve the problem without affecting work efficiency, you can then compare other devices or work arrangements rather than attributing the management problem entirely to capacity. But this conclusion should be the last option after trying all management methods, not a direct attribution to "SSD too small" without understanding your data composition.
Sources
- MacBook Air - Tech Specs - Apple
- MacBook Pro - Tech Specs - Apple
- Free up storage space on Mac - Apple Support
- 在 Mac 上优化储存空间 - 官方 Apple 支持 (中国)
- Move your Photos library to save space on your Mac - Apple Support
- Move your iMovie for Mac library - Apple Support
- Back up your Mac with Time Machine - Apple Support
- Studio Display - Technical Specifications - Apple